|
|
||||||||||||||
 |
||||||||||||||
 |
|
The next major bit of terrain I want to tackle is the infamous BUA (Built Up Area) known to the man in the street as villages and towns. Since I will be using 6mm figures almost exclusively with this box, an obvious solution is 6mm buildings. They are small, cheap and I already own a good collection. But relative to the likely ground scale of my games they will be far too big. I’d like my towns and villages to look that way - like clusters of buildings. So we head to the drawing board to make a few towns. As always we start out with our criteria:
My first thought is of the forest stand with the removable base. Could I design a town that would have a hollow or removable center so I could put troops inside? One easy solution is to make an urban base that depicts the foot print of the town. When occupied, remove the town and replace with the troops. Easy, but I’d like something a bit more slick. I rummage through my collection of buildings for all scales, and the solution presents itself. I have paper terrain with lift off sections to reveal damaged sections underneath. All I need now is to replicate this somehow. Looking through I see a collection of buildings from The Miniature Building Authority. When placed side by side, they form this kind of street scene:
What I need is a street scene like that that I can print out on card stock. By printing several and taping them together I’ll end up with a long strip of buildings. I can then fold this into a hollow square, and place it on a base. I’ll make a form out of match sticks that will act to hold the paper in place so it does not collapse into it’s folded state. For a test run I just use the banner above. I import it onto paint and edit it to look like this:
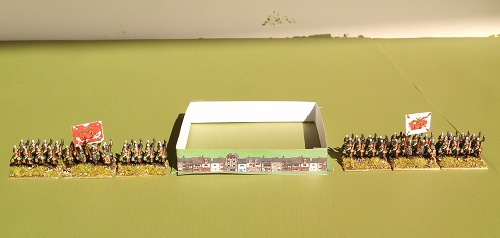
I drag this in to Powerpoint and resize it to 1/2” tall. I then crop off the ends ending up with an image 1/2” by 1 2/3” By stringing together 3 strips I get a 1/2” by 5” strip. I print a handful out on ordinary paper just to see how they size up. A few minutes with scissors and tape and I have my empty town box. Here it is in the box with some 6mm Russian Grenadiers for scale:
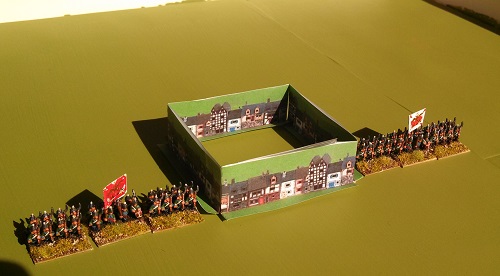
A couple things jump out right away. The buildings need to be taller. Even allowing for a certain aesthetic, these are just too small. I decide to try to increase the size to 1” tall. The strips are now over 9” long. Second, they obviously need to be double sided! It won’t matter if the fronts and rears match up so long as we get rid of the big white blob! Here is a revised test of the concept:
An obvious improvement. The resulting village has interior dimensions of 60x60mm. Perfect for my armies as they are all based on 20x20 or 20x15 bases, and occasionally use 60mm movement trays. A few more notes:
Obviously this same concept can be applied to lots of other terrain types. Heck, if you can live with squares you could do forests this way. But I’m thinking of stone walls, fences, hedges and hedge rows, or anything that is generally tall but with a small footprint. Endorsement: By the way, Miniature Building Authority make spanking good buildings. I buy pretty much every thing they make in 15mm size. Often I get duplicates. They come painted and assembled. They all have accessible interiors, either with a lift off roof, or else they have a removable top that leaves behind a destroyed version of the same building. Pricey but worth every penny in my opinion. Plus they come in boxes with styrofoam cut outs. Safe storage and the boxes have labels/photos so you know what is in each box! Up next: Rivers, streams, ponds and other water features. |
|
[Battlefield In A Box] [Terrain: Part 1] [Terrain Part 2: Woods] [Terrain Part 3: The Hills] [Terrain Part 4: Towns] [Terrain Part 5: Rivers & Streams] [Terrain Part 6: Rivers II] [Final Touches] [Post Mortem] |
 |
|||
|
|
|||


